Test Case: Navigating from objects to other UI elements
1. Navigating from an extractor to the Test Case Tree. Extractor Grid displays all extractors in the test case. In order to determine which request the selected extractor belongs to, double-click the extractor row, or right-click and select “Show on Tree”, or click the “Show on Tree” button on the toolbar (Fig. 1)
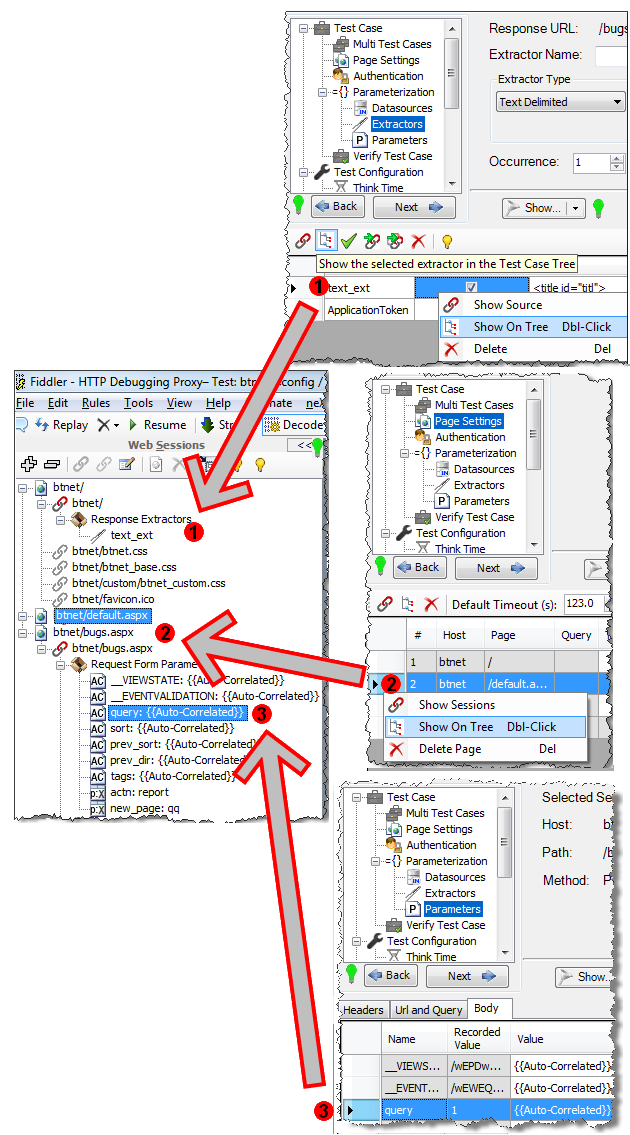
Fig. 1
2. Navigating from a page to the Test Case Tree. Page Settings Grid displays all pages in the test case. In order to navigate from the Page Settings Grid to the Test Case Tree, double-click the selected page or right-click and select “Show on Tree”, or click the “Show on Tree” button on the toolbar (Fig.1)
3. Navigating from a parameter to the Test Case Tree. In the Parameters Grid, double-click the selected parameter or right-click and select “Show on Tree” (Fig. 1)
4. Navigating from Test Case Tree to Fiddler grid.When the Test Case Tree is in the right position in StresStimulus, double-click the selected request, and corresponding session in the fiddler grid will be highlighted. (Fig. 2)
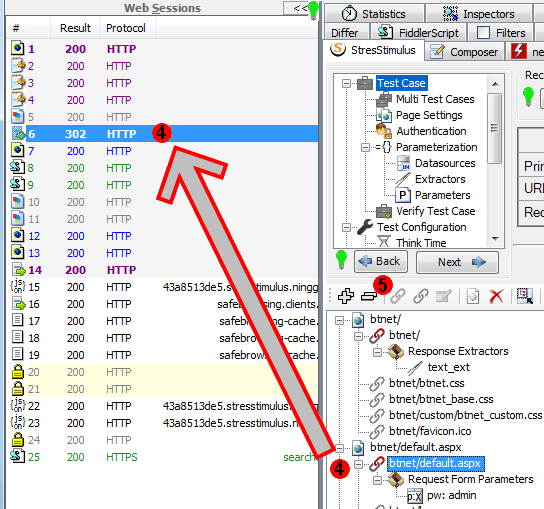 Fig. 2
5. Back button. To navigate to the previous position in the UI, click the back button. StresStimulus maintains a stack of multiple UI positions. Each of which has several characteristics such as selected node on the navigation tree, position of the test case tree (left or right) and some other UI position characteristics. The Back button is located under the StresStimulus Navigation Tree where it replaced the Previous Button. (Fig. 2)
Test Case: Adding, repositioning, hiding and validating objects
6. Cloning and moving extractors. To move an extractor, drag-and-drop it to a different response on the Test Case Tree (Fig. 3). To clone the extractor, do the same, while holding the Ctrl key.
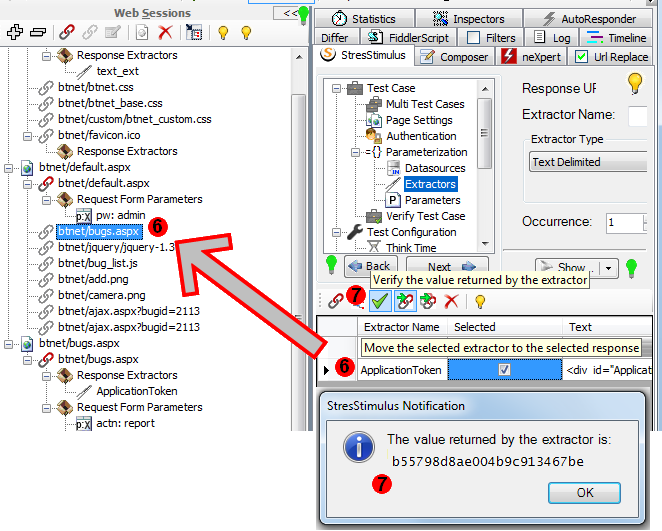 Fig. 3
7. Validating recorded Extractors. To check if an extractor is created correctly, selected it and click the “Verify “button on the Extractor Grid. The pop-up message will display the value returned by the extractor (Fig.3). Make sure that this value is the same one that was used when the extractor was created.
8. Validating Extractors during verification.Test case verification now validates extractors during replay and reports any of the following conditions (Fig. 4):
- Extractor was not found. This is an Error that is triggered when the Extractor was not found while parsing the response.
- Extractor was not used. This is a warning that is triggered when none of the requests utilize the extractor.
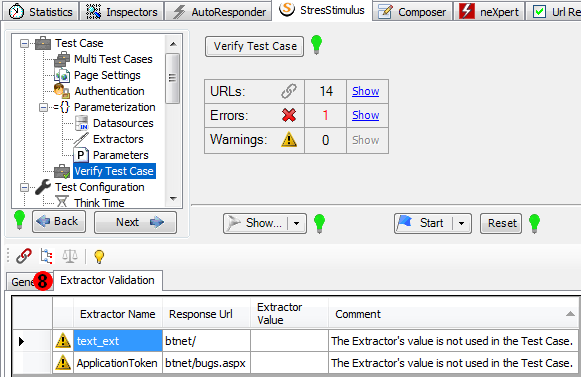 Fig. 4
9. Adding a Parameter or Extractor from the Test Case Tree.To add a new Parameter or Extractor to the selected request, right-click and select necessary “Add” option (Fig. 5).
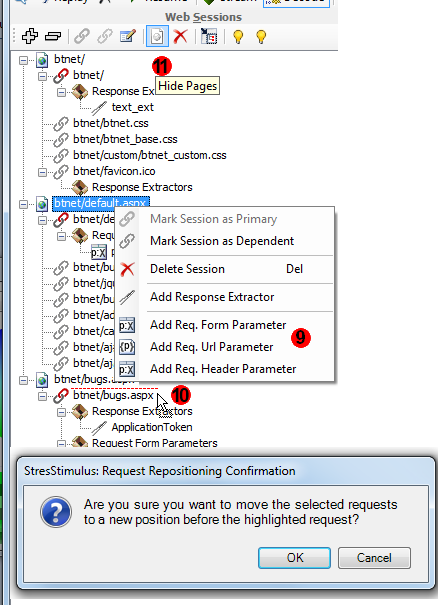 Fig 5.
10. Repositioning a request or a page on the Test Case Tree. To reposition a selected request or page, drag-and-drop it to a new position (Fig. 5).
11. Hiding / un-hiding the page objects in the Test Case Tree. A user can hide the page objects in the Test Case Tree. This is convenient when load testing Web services, Silverlight applications or other web applications where all request are primary and there are no dependent requests. In this case to hide page objects above every primary request, click “hide pages” on the Test Case Tree toolbar (Fig.5).
To navigate to other parts of the v2.0 release notes, click the links below:
V2.0 beta is available for download here.